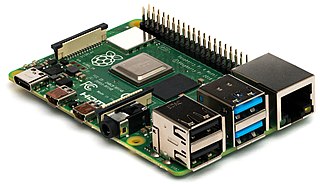
Photo credit: Michael Henzler
Wikimedia Commons, CC BY-SA 4.0
The Raspberry Pi for basic Networking services series:
- Part 1: Introduction
- Part 2: DHCP server
- Part 3: Static IP addresses
- Part 4: DNS
If you're like me, your home network is a bit more complicated than just providing Internet access to a laptop and a few mobile devices.
My network, for example, has two desktop computers, five laptops, three tablets, four phones, a Raspberry Pi, an iPod Touch, two Kindle book readers, a printer, a smart TV, a DVR, three game consoles, an Apple TV and an Internet-connected Hi-Fi amplifier. That's 26 devices and I haven't even mentioned the cable modem, the router or any of my older devices that are rarely turned on.
Additionally, although most devices access Internet services, many of these devices access each other. For instance, the two desktop computers are running servers for web pages, file sharing, music sharing and remote login.
When you've got a network this big, the factory default configuration that comes with your router, whether purchased or provided by your ISP, just isn't going to cut it. At minimum, you will want to assign static IP addresses to some (if not all) of your equipment so you don't need to figure out the IP address when you need to connect. You will also want a DNS server so you can access them by name without needing to synchronize dozens of "hosts" files.
Most consumer routers include minimal features to support this, but they are often inflexible, limiting your configuration options.
You can also run these services on desktop/laptop computers. Linux is an especially good platform for running them, but they are available for Windows and macOS as well. The downside to using your computer is that the computer must be powered on and connected to your LAN at all times. This means you can't turn it off or put it to sleep, and you can't take it with you when you leave home.
The solution is to get a computer that is small, inexpensive and very low-power. This way, you can leave it powered on all the time without consuming too much power. The Raspberry Pi platform is ideally suited for this.
I realize that in my case, I could use one of my two desktop servers for this purpose, and for many years I did just that. But servers are sometimes shut down or go off-line, often as a part of installing mandatory system upgrades. And I use these computers as desktop workstations - I don't want a CPU-intensive app to cripple basic network services for my LAN. Once again, the Raspberry Pi becomes a great alternative.
This is the first article in a series. The next article describes how to set up a DHCP server (to assign IP addresses to nodes on my LAN). Subsequent articles will discuss how to use your DHCP server to configure static IP addresses and how to set up a DNS server (to provide name-to-address mappings).

No comments:
Post a Comment